When water shows up somewhere it shouldn’t – a burst pipe under the kitchen sink, storm runoff seeping into the garage, a slow leak behind the drywall – most homeowners just want one thing: someone to come fix it. But before any restoration crew starts pulling up flooring or running air movers, two distinct steps almost always happen first: an inspection and an assessment. The terms get used interchangeably online, but they’re not the same thing, and understanding the difference can save you time, money, and a lot of confusion when you’re already stressed about damage to your home.
If you’re dealing with water intrusion in Cape Coral right now, here’s what each step actually involves, why the order matters, and what happens next.
What Is a Water Damage Inspection?
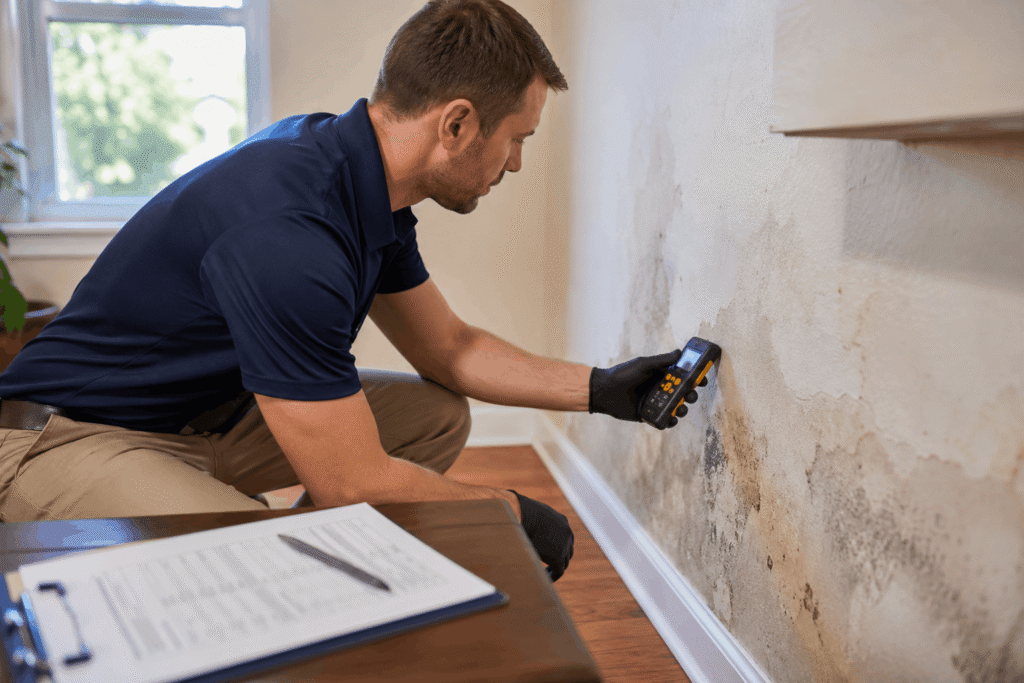
A water damage inspection is the first, fastest step. It’s a technician physically walking your property to answer one core question: where is the water, and where is it going?
During an inspection, a technician typically:
- Uses moisture meters and thermal imaging to locate water behind walls, under flooring, or inside cavities you can’t see
- Identifies the source of the intrusion (plumbing failure, roof leak, storm surge, appliance malfunction)
- Checks for immediate safety hazards, like electrical exposure or structural instability
- Documents visible and hidden damage with photos for insurance purposes
An inspection is diagnostic. It’s quick – often 30 to 60 minutes for a residential property – and it’s the step that determines whether you even need a full restoration plan or just a targeted repair.
What Is a Water Damage Assessment?
A water damage assessment goes further. Once the inspection has confirmed there’s a problem and located the water, the assessment digs into scope, severity, and strategy.
An assessment typically includes:
- Classifying the water category (clean, gray, or black water) since that determines how it must be handled legally and safely
- Measuring the extent of saturation across affected materials – drywall, subfloor, insulation, carpet padding
- Estimating drying time based on humidity, airflow, and material type
- Evaluating contamination risk, especially if the water sat for more than 24-48 hours
- Building a line-item restoration plan, including equipment needs, labor, and timeline
- Producing documentation detailed enough to support an insurance claim
In short: the inspection tells you what’s wrong. The assessment tells you how bad it is and what it will take to fix it.
The Key Differences at a Glance
| Inspection | Assessment | |
|---|---|---|
| Purpose | Locate water & source | Determine scope & plan |
| Timing | First step | After inspection confirms damage |
| Duration | 30–60 minutes | Several hours, sometimes longer |
| Tools | Moisture meters, thermal cameras | Same tools, plus lab testing when contamination is suspected |
| Output | Confirmation of a problem | A restoration scope of work and cost estimate |
Some restoration companies bundle both into a single visit, which is common for straightforward residential cases. Larger losses – flooding, sewage backup, or damage that’s gone unnoticed for days – usually need them handled as separate, more thorough steps.
Why the Order Matters
Skipping straight to “assessment” without a proper inspection is how homeowners end up with incomplete repairs. If a technician doesn’t fully trace where the water traveled – behind cabinetry, under subflooring, into wall cavities – the restoration plan built afterward will miss those areas. That’s how mold shows up three weeks later in a spot nobody dried out the first time.
This is especially relevant in Cape Coral, where humidity is high year-round and standing water or trapped moisture can lead to microbial growth within 24 to 48 hours. A rushed or partial inspection is one of the most common reasons restoration jobs need to be reopened.
What Happens After the Assessment
Once the assessment is complete, restoration moves into execution. This generally follows the step-by-step water damage restoration process most licensed companies use:
- Water extraction :- removing standing water with pumps and extraction equipment
- Drying and dehumidification :- industrial air movers and dehumidifiers brought in based on the assessment’s drying estimate
- Cleaning and sanitizing :- especially critical if the water was classified as gray or black
- Repair and reconstruction :- replacing drywall, flooring, or insulation that couldn’t be salvaged
If the source was a sudden failure like a pipe rupture, emergency water extraction often needs to start before the full assessment is even finished, since every hour standing water sits increases both damage and cost.
Common Situations That Trigger Both Steps in Cape Coral
A few scenarios come up again and again for local homeowners:
- Burst or failed plumbing:- A burst pipe can dump hundreds of gallons before anyone notices, especially in a slab-on-grade home common throughout Cape Coral.
- Kitchen and appliance leaks:- A slow drip from a dishwasher or sink overflow can soak subflooring for weeks before it’s visible.
- Storm and flood intrusion:- Heavy rain events send water into garages, lanais, and ground-floor living space, which is where flood damage cleanup comes in.
- Sewage backups:- These require a different inspection protocol entirely, since sewage backup is a health hazard that involves black water classification from the start.
In every one of these cases, skipping the inspection step to “save time” almost always costs more later, either through missed damage or an insurance claim that gets challenged for lacking documentation.
Insulation, Mold, and What Gets Missed
Attics and wall cavities are where inspections earn their keep. Wet insulation holds moisture long after surfaces look dry, which is why wet insulation removal and replacement is frequently part of the restoration scope even when the ceiling itself looks fine. If moisture sits undetected, it becomes a mold problem – and mold remediation is a far more involved (and expensive) process than catching moisture during the initial inspection.
What Determines the Cost
Homeowners often ask for a number before any technician has even seen the property, but cost genuinely depends on what the inspection and assessment find – category of water, square footage affected, and how many materials need replacement versus drying in place. For a general sense of what factors drive pricing, our breakdown of average restoration costs walks through the variables in more detail.
Choosing the Right Company for the Job
Not every company treats inspection and assessment with the same rigor. Some skip straight to a repair quote without documenting moisture readings, which can leave you underinsured if the claim is disputed later. When vetting a restoration company, look for IICRC certification, clear written scopes of work, and photo/moisture documentation as standard practice – not an upsell. Our guide on how to choose a water damage restoration company covers the specific questions worth asking before you sign anything.
Serving Homeowners Throughout Cape Coral
We provide inspection and assessment services throughout Cape Coral, including Sandoval, Cape Royal, and Kismet-El Dorado, along with surrounding neighborhoods. Response time matters most in the first few hours after water intrusion, so having a local team who already knows the housing stock and common failure points in each neighborhood makes a real difference.
Bottom Line
An inspection finds the water. An assessment tells you what it will take to fix it. Both need to happen – in that order – before any restoration work begins, and both need to be documented thoroughly if you’re filing an insurance claim. Rushing either step is the single most common reason restoration jobs run over budget or need to be redone.
If you’re dealing with water damage right now, contact us for a same-day inspection and assessment. The sooner the water is located and the scope is defined, the less it costs to fix – and the less likely you are to be dealing with mold in a month.
Leave a Reply